Back to TheWorxHub for Senior Living Main Menu
Miscellaneous
To access the Miscellaneous settings in TheWorxHub:
- Click on the Settings tab, then select the Misc tab.
Site Meters
Site meters are a unique type of meter that applies to your whole site. A good example is water temperature or indoor air quality. For information about adding site meters from this tab, see Site Meters.
Request Notifications
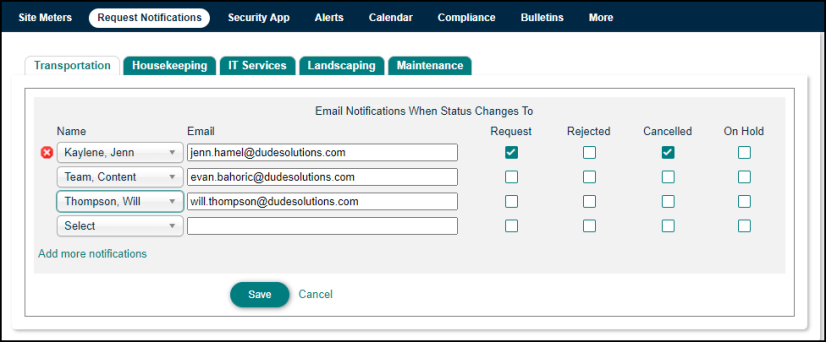
You can set up email notifications for individual users in the system according to department and work order status.
- Click on the New Request Notifications tab.
- Click on the appropriate Department.
- Select the Name of the user who wants to receive email notifications. This will populate the Email field with the user's email address.
- Check the statuses that should trigger a notification for this user, then click Save.
Security App
The Security App settings allow you to determine which security incidents are private, how far in advance round instances are generated, and whether the security app will display military time.
Security Incidents Privacy
- Check the box next to each security incident category you would like to make private, and then click Save.
- When an incident is marked as private, only users who have the Can View Private Incidents permission selected can view the incident information.
General Security Settings
- Select the number of days in advance you would like security round instances to generate from the drop down.
- Check the box next to Show Time in Military (24 hour) Format if you would like the security app to display military time.
Room Bookings
The Room Bookings settings will apply to your account if your organization uses the Room Bookings application. For information about setting up for Room Bookings, see Room Bookings Setup.
Alerts and Service Areas
This section serves as a pick list for the Service Areas that may need to be addressed upon a failed survey or inspection. When you choose to require a Corrective Action as the result of a failed survey or inspection, a Take Corrective Action window will appear where you can select the Service Area, describe what needs to be done, and select a level of Severity. *Note: The Alerts and Service Area settings only apply if you are using the Survey/Insepection module.
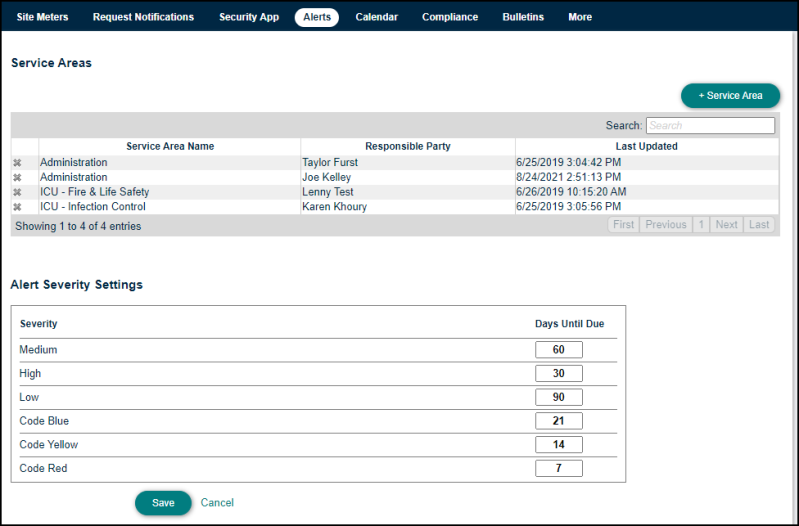
To set the Service Area settings:
- Click on the Alerts tab.
- Click the Service Area button.
- Enter a Service Area Name in the Add New Service Area pop-up.
- Select a Responsible Party from the list and click Save.
- In the Alert Severity Settings section, enter the number of Days Until Due for each severity level. This will send out an alert if the work has not been addressed by the due date.
- Click the Save button.
Calendar
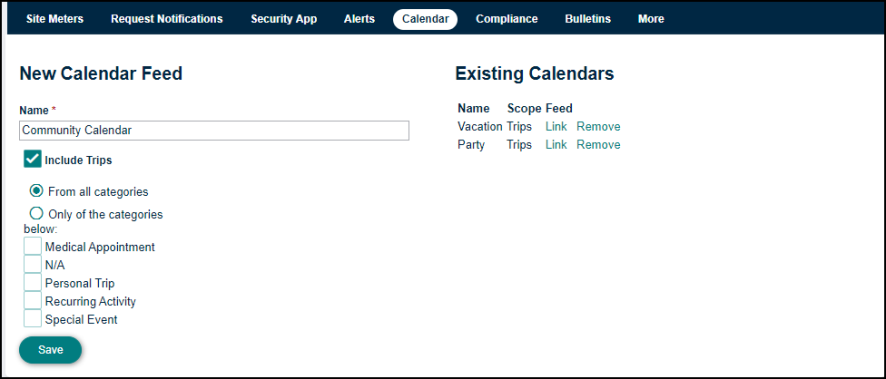
The Calendar settings allow you to create Room Booking and Transportation feeds for a third party calendar or RSS reader.
- Click on the Calendar tab.
- Enter a Name for the calendar feed.
- Check the box next to Include Room Bookings to include these events on the calendar feed. You can select which events show by using the selection boxes below.
- Check the box next to Include Trips to include trips on the calendar feed. Select the first option if you want to include all categories. If you want to select specific categories, select the second option, and then choose the categories needed.
- Click Save to create the feed link.
- To view your feed link, click Link in the Existing Calendars section of the page. *Note: For help integrating your link into your RSS reader or calendar, contact your IT department.
Bulletins
Bulletins in TheWorxHub are a way of sending out interdepartmental or facility-wide messaging for a time sensitive topic. When you add a bulletin, it is pushed to TheWorxHub as well as MobileWorx, and will display with an indicator on the Dashboard to inform you of the new bulletin. For more information about adding Bulletins, see Adding and Managing Bulletins.
More
Additional settings options can be found by clicking on the More tab.
Assets
- Enter the Default Inflation Rate for Capital Planning. This should be entered as a whole number. *Note: If you do not currently have the Capital Planning application, please contact your Sales Representative or Client Services for more information.
-
Click Save Asset.
- Click Save Asset.
Contractors/Suppliers
- Enter the Label for custom Contractor/Supplier Expiry Date. This will change the expiration date field name on the Staff/Contractor form.
- Click Save Contractor.
Week Starts On
- Choose the day of the week your organization considers the beginning of a full week.
- Click Save Week Starts On.
Print Logo
- To add your organization's logo to printed forms such as POs, click the Change Logo link.
- Click the Choose File button and select the logo file you would like to use. *Note: It is recommended that the image's vertical height be no more that 100 pixels. Larger images can slow down the printing process.
- Click Upload to save the logo.
